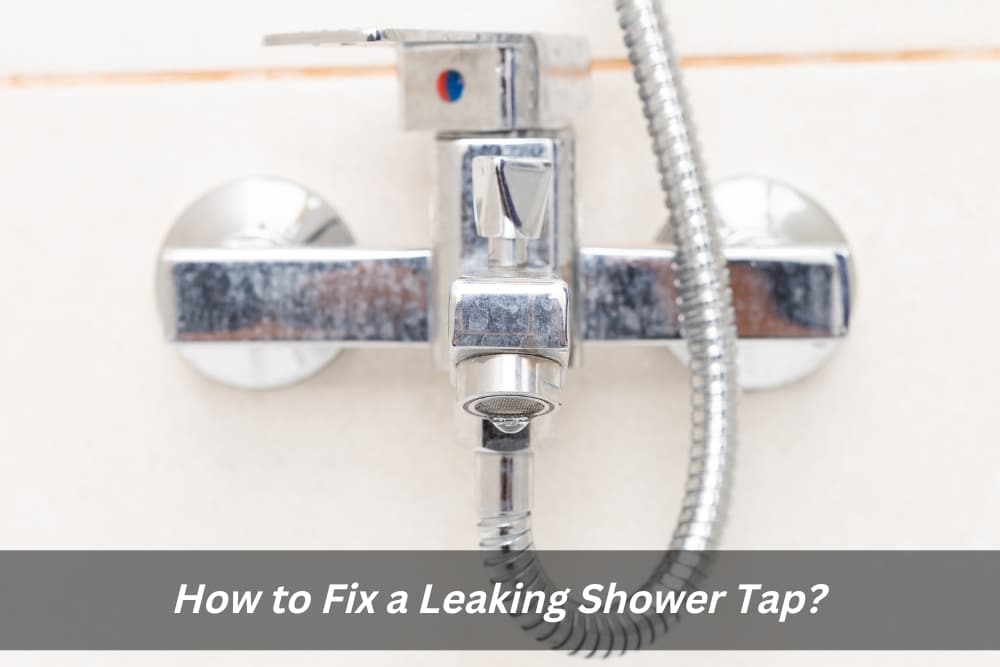
A leaking shower is pretty annoying when your bedroom is next to the shower and you can hear it drip dripping all night long. Not to mention the waste of water, and/or electricity if it is the hot water that is leaking. Do you know How to Fix a Leaking Shower Tap? If so, don’t worry – we can walk you through the 5 steps we take to fix this issue. All you need is a screwdriver and a little bit of patience. So grab your tools and let’s get started!
Fixing a leaking shower and stopping the irritating leak is much the same as stopping a regular basin tap from leaking. A spring-loaded flange is one of the distinguishing characteristics of a shower tap in contrast to a basin tap. The spring-loaded flange is intended to keep the flange flat against the wall of the shower. It can also unexpectedly pop off the whole tap if the screw cap on the tap handle has come undone as a result of wear and tear.
Leaky Tap – Risks of Leaving it Untreated.
Health Risks
A Leaky Tap that’s left unfixed can cause water to pool under cupboards and around the joints of sinks and vanities. These pools of water around sinks can eat into silicone and erode joins, which then allows germs to sit and fester. This is a brilliant way to accumulate mould infestation in your home. Assuming that mould infestation is something you obviously would want, fixing that tap is essential to avoid such disasters.
Mould growth in damp houses is harmful to your health. It can cause nasal blockage, sneezing, a cough, wheezing, respiratory infections, and asthma and allergy symptoms to worsen. Those with weakened immune systems or allergies who are more prone to these symptoms and other serious health problems include those with immunodeficiencies and allergies.
Structural Damage
Leaky taps can also cause significant structural damage to your property if left unaddressed. You could end up with foundations, walls, and floors damaged, as well as being unable to live in your house for a short period of time if this isn’t addressed promptly.
When left untreated, the corrosion can cause various types of structural damage such as cracks on both interior and exterior walls, broken arch bars of doors, falling masonry and displacement of door/window frames. Fixing these structural issues will cost you a lot more than fixing your leaky tap.
Low Water Pressure
Everyone prefers to be showering in a home with strong water pressure, but if you’ve been feeling like your shower head has been only drizzling water, then your hot water and cold water flow of water is definitely being affected by a leaky tap.
Even though a leak might not be that substantial, even the smallest of leakages may affect your water pressure. This is because a minor leak might be misdirecting the water supply and as a result, you will not be getting the full flow of water you desire.
Higher water bill
Generally, a dripping tap will certainly set you back around $20 monthly. Now, that does not feel like much in the overall scheme of things. It can swiftly add up. If you have more than one leak, that price is most likely to double, triple, as well as also quadruple.
A single gallon has a capacity of 3,785 mL, so that’s 15,140 drips per gallon. This means our 1-second-dripping faucet wastes over 5 gallons of water every day and just under 2,083 gallons each year. The figures only get worse if your faucet drips more rapidly or if you have more than one leaky tap in your home.
Tools Necessary To Fix Your Leaky Tap:
First and foremost, collect your tools. The following tools are really useful to have in a home plumbing first-aid kit. Universal tap spanner (multi-fit), small flat-head screwdriver, an adjustable wrench or shifter, 13mm-19mm tap researcher, waterproof tap lubricant, and plumbing tape.
How To Fix Your Tap
Step 1:
Turn off the water supply. It should be a garden-variety tap out the front of your house, and there will be a water meter with it.
Step 2:
Use your screwdriver to remove the shower faucet tap lid, and be ready to catch the tap handle. After you remove the handle, pull off the flange and remove the cartridge, now you should be able to see the tap assembly. Use the multi-tap spanner or the shifter to loosen the tap bonnet and pull out the assembly.
Step 3:
There will be a red body washer on the bottom of the tap bonnet – check this for wear and replace it with a new one if needed. The tap spindle can be unscrewed from the tap bonnet by hand. Pull the tap valve out and have a look at it. If your tap is leaking, this is one of the parts that you should replace with a new one. Replace any rubber seal that looks worn out also. You can slip the new tap valve into the bottom of the reassembled spindle and bonnet assembly.
Step 4:
Insert the assembly back in, and tighten it. Put the spring-loaded flange and handle back on. Turn the mains back on as well, and test the shower out.
Step 5:
Don’t panic if the shower is still leaking. The problem may be within the shower arm or the head itself. You can get this free by using an adjustable wrench or shifter on the bolt at the base of the shower arm. If the leak is coming from the base, wrap up the exposed thread with plumbing tape and look inside the base of the shower handle for a black O ring. Those are our steps to fix your leaking shower tap!
Confused? Don’t fret. Apex Plumbing is here to help.
Apex Plumbing is here to help with all of your plumbing needs, big or small. If you’re still having trouble fixing the leaky tap after following our 5-step guide you can check out our 8 Signs Your Bathroom Plumbing Needs Repair, or are simply confused after just reading through our steps, don’t hesitate to give us a call for assistance. We follow a strict protocol to ensure that your taps are leak-free. There’s a wide array of reasons to fix that leaking shower tap in your home, from health reasons, structural damage, lower water pressure and higher water bills; we can help to alleviate all these concerns you may have about your leaky tap. We’re happy to help!


